dbt is a great data modeling tool you can use to help you model GA4 data. This post will cover how to connect your BigQuery databases with dbt.
First off…
After you connect your GA4 account with a BigQuery project, you will have raw GA4 data flowing in constantly from GA4 to a BigQuery table.
That database (or in BigQuery terms: the “project”), that your GA4 data is flowing into will be your “Raw” database. All data from other source systems (if you want to bring them in) will go into this same database but in a different “dataset”.
Currently, your GA4 data should be flowing into a dataset with a name that looks like: analytics_252738161. The 9 numbers at the end will be unique and different for every GA4-to-BigQuery setup. The name analytics_252738161, is the name of your “dataset”.
Recommended data model setup:
In data modeling, I have found a common setup that looks like this:
You’ll have 3 databases or “projects” created…
- Raw database – Where all your raw data from different source systems get dumped
- Staging database – Where all “staging” data models go
- Warehouse database – Where all your final data models go, like your dimension tables, fact tables, aggregated cube tables, etc.
All of the 3 databases above will be considered in “production”.
What’s optional but recommended is setting up another database called
- Development database – Where all your models get materialized in a “development” environment before getting pushed to “production”
In the first step of connecting BigQuery with dbt, you’ll create all of these databases. Moving forward, we’ll refer to these databases as “projects” in BigQuery.
1. Create your database(s) a.k.a “projects” in BigQuery
Raw project -> This should already be created and running if you have already successfully connected GA4 with BigQuery. If not, or if you’d like to create a different project for your raw data, you can create a new project in BigQuery.
For the other projects, create a new one for each of the following:
- Staging project
- Warehouse project
- Development project
Suggestion for project names
If you’d like recommended names, you can use something like the following… (using an example company name “Superb Analytics”.
| Project type | Suggested project name template | Example project name | Example project id |
| Raw project | <your_company_initials>-prod-raw | Prod Raw | sa-prod-raw |
| Staging project | <your_company_initials>-prod-staging | Prod Staging | sa-prod-staging |
| Warehouse project | <your_company_initials>-prod-warehouse | Prod Warehouse | sa-prod-warehouse |
| Development project | <your_company_initials>-dev-analytics | Dev Analytics | sa-dev-analytics |
*Note: Project names can be anything you want. Project IDs must be unique and different for every single project across BigQuery (even for different users), so you have to pick an ID that no one else is using. Feel free to add a meaningful number to the end of the project IDs if you need to, example:
sa-prod-raw-769sa-prod-staging-769sa-prod-warehouse-769sa-dev-analytics-769
How to create a project in BigQuery
- While inside BigQuery, a) click on the dropdown of your current project name, then b) Click on New Project.

2. Set the project name and project ID. You set the project ID by clicking on ‘Edit’.
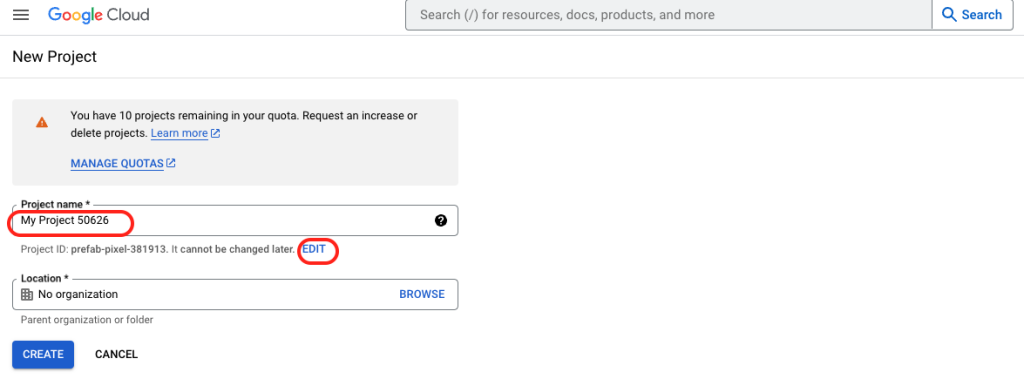
Note: If you have a certain number of project remaining in your quota and need an increase, just fill out this Project Quota Increase Request form and Google will approve your request.
2. Create a service account in Google Cloud Platform and assign permission roles
What is a service account in Google Cloud Platform?
Think about: what do you use to login to a website? A username, right? A service account is basically a username but for allowing an application access instead of a person.
It’s a unique email address created so that applications like dbt can access your BigQuery warehouses, read, and write to them.
How to create a service account
- Go to the service accounts page:
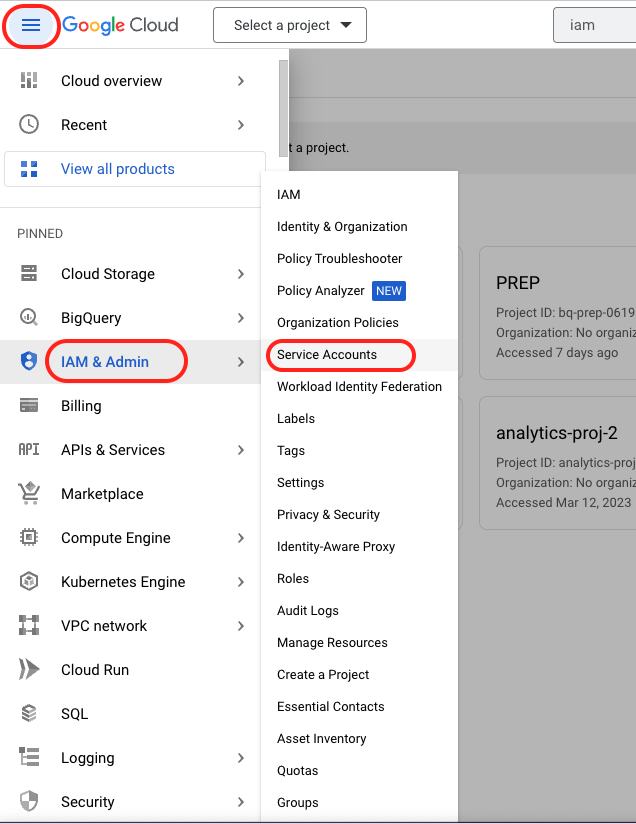
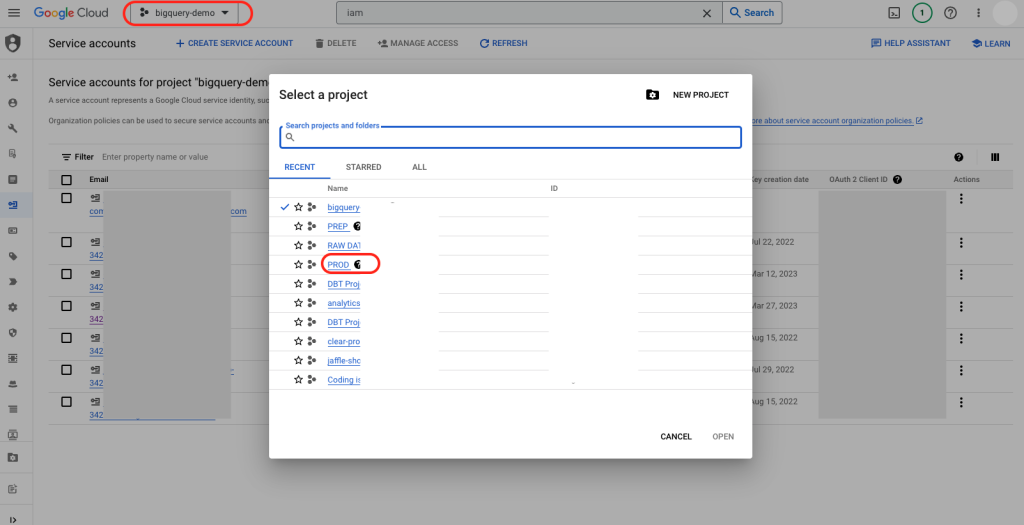
2. Select your newly created development project to create a service account in.
3. Click “Create a new Service Account”

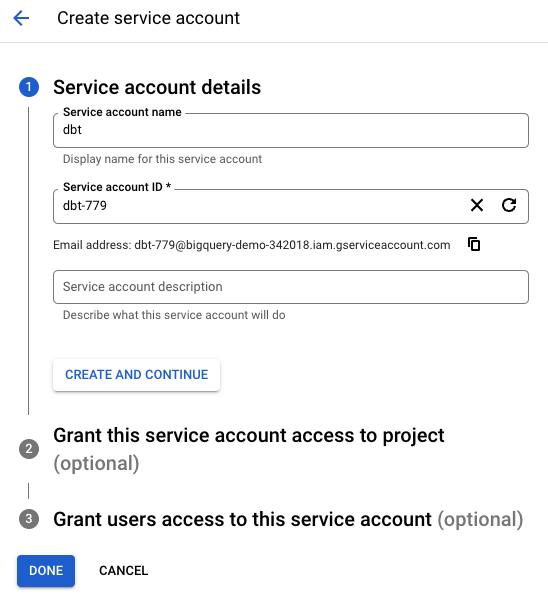
4. In the section “Service account details”, inside service account name box, type “dbt”. (This can be anything you want to name your service account as…)
The Service account ID will also be autofilled. (You can change this or keep as-is, it won’t matter.)
Then click “Create and Continue”.
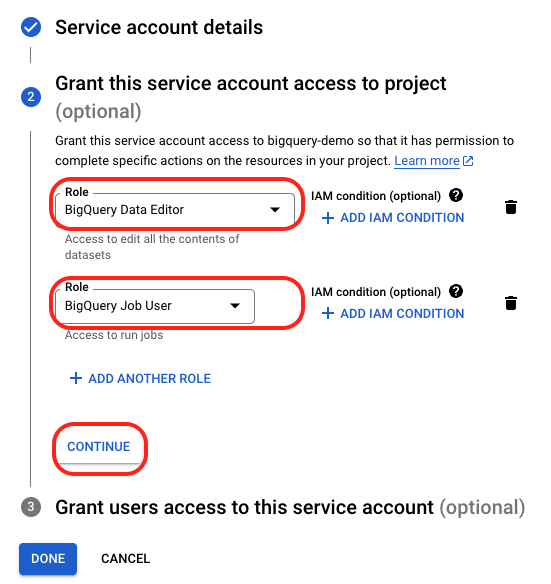
5. For the section “Grant this service account access to project“, you’re going to enter in the following roles…
Since this step is allowing us to set which roles (permissions) we want to give to the “Development project”, we want to give this service account username access to 1) edit the data and 2) create jobs in the Development project BigQuery database.
So choose:
- BigQuery Data Editor
- BigQuery Job User
Then click “Continue”.
6. For the section “Grant users access to this service account”, you can leave blank.
7. Hit “Done”.
Your service account is now created.
3. Assign permissions to service account for each database
Now that your service account is created, take note: it now ***only has permissions to access your “Development” project. ***
Remember: we created other projects too… Staging project, Raw project, and Warehouse project.
We want dbt to be able to access these and write to them also…
So here are the permissions we’ll need to give to the service account for each project:
- ✅ Development database – BigQuery Data Editor, BigQuery Job User (Completed already)
- 🔲 Staging database – BigQuery Data Editor, BigQuery Job User
- 🔲 Warehouse database – BigQuery Data Editor, BigQuery Job User
- 🔲 Raw database – BigQuery Data Viewer only
Since we want dbt to edit the data and run jobs for all database projects except for the raw project, we will add the Data Editor and Job User roles for each of those projects.
For the Raw project, since we only want dbt to “read” the data, and not make any type of edits to it… we will give the service account “Data Viewer” access only.
How to assign permissions to service account for different projects
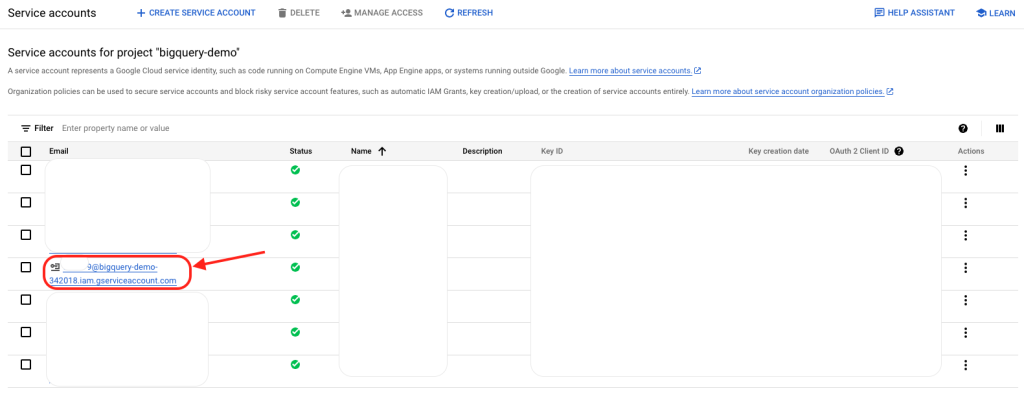
- Copy the email address of the service account you created in the “Service Accounts” page of your Development project.

2. Navigate to your Warehouse project by clicking on the Project dropdown in the header, then selecting your Warehouse project name.
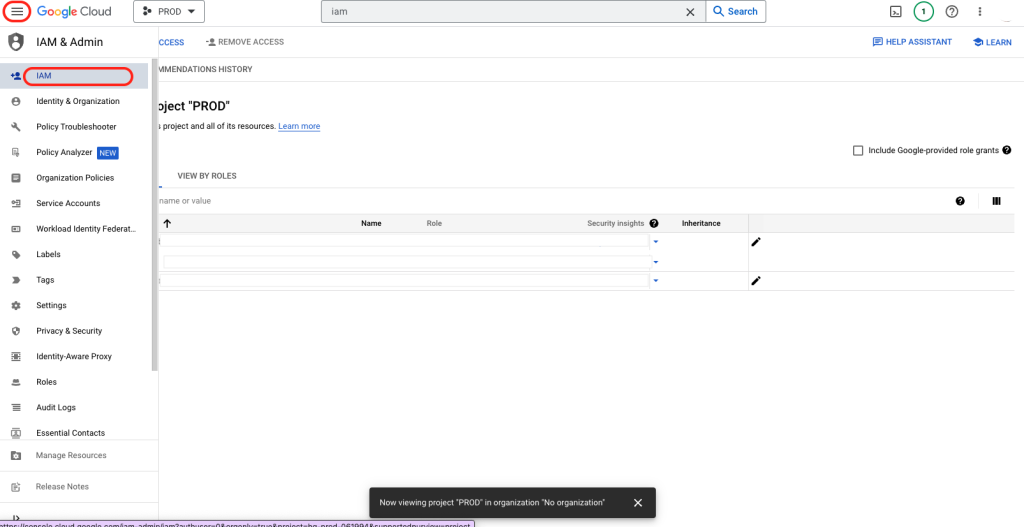
3. Navigate to the IAM page in the menu bar.
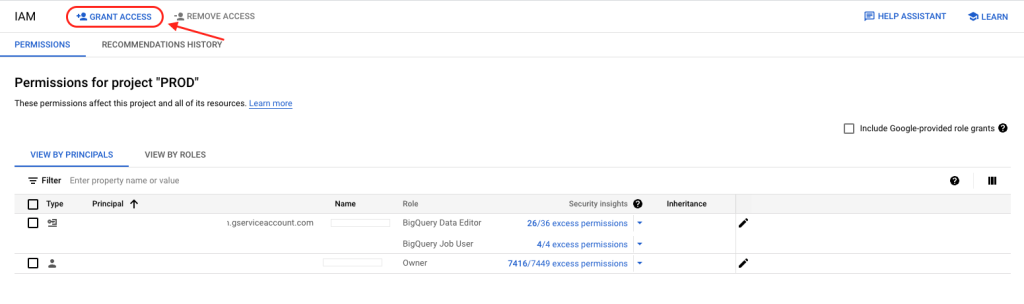
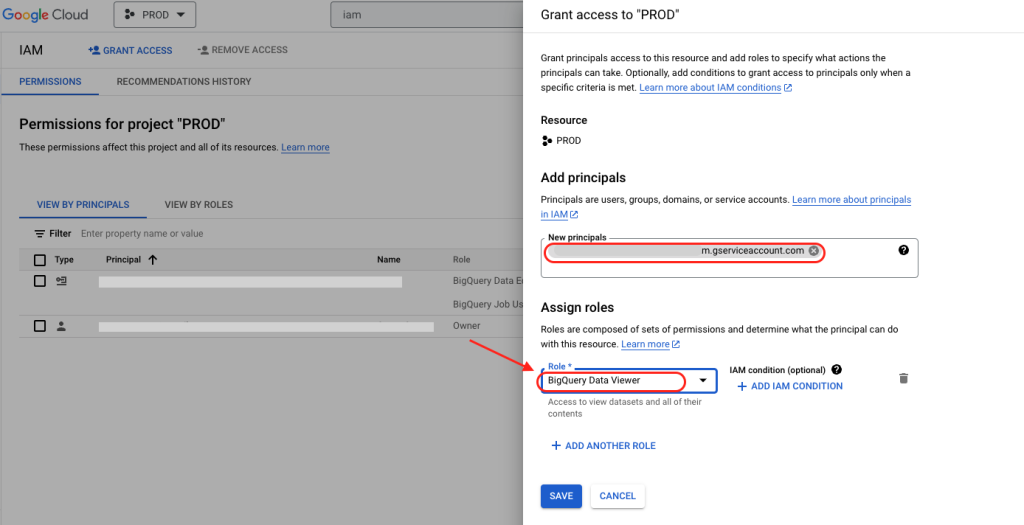
4. Click on “Grant Access”.
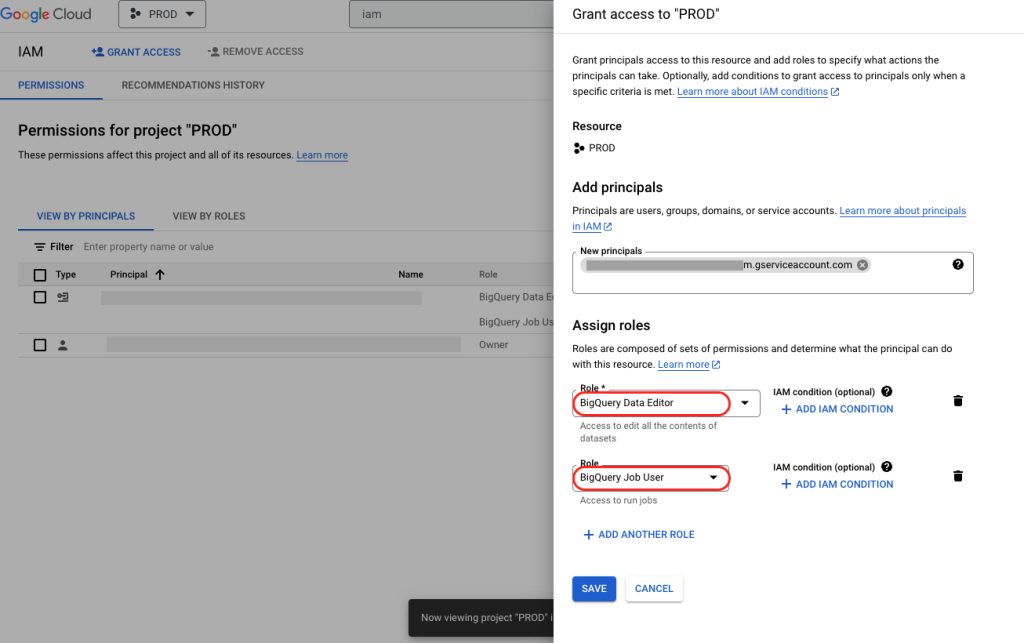
5. Paste the email address of the service account you created, and enter roles for “BigQuery Data Editor” and “BigQuery Job User”.
6. Repeat all steps for your Staging project.
7. Repeat all steps again, but for your Raw project, and for this, assign role “BigQuery Data Viewer” only.
4. Create a new JSON key for your service account
What’s a JSON key for a service account?
If creating a service account is like creating a username, creating a JSON key is like creating the password for that service account. Later, you’ll use the JSON key and enter it into dbt, so dbt can access your database.
How to create a JSON key
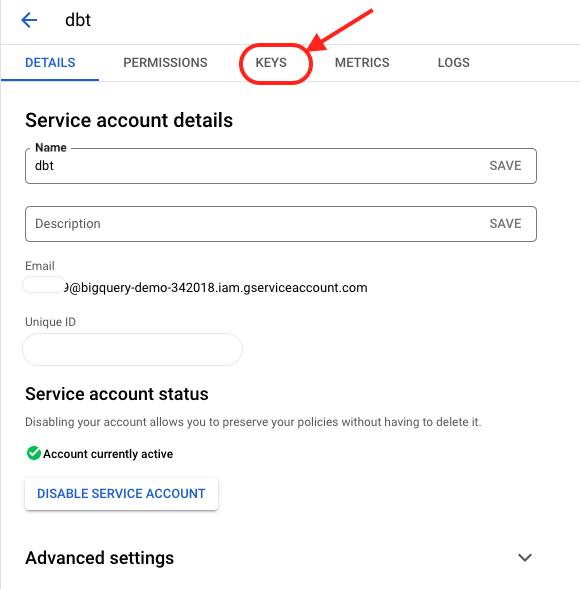
- Click into the newly created service account you just created. (Should be in your Development project).
2. Click on “KEYS”.
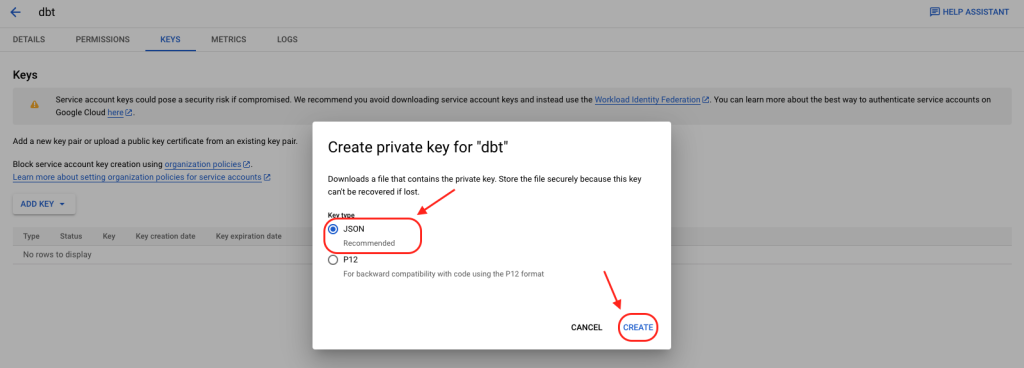
3. Click on “Add Key” and “Create new key”.
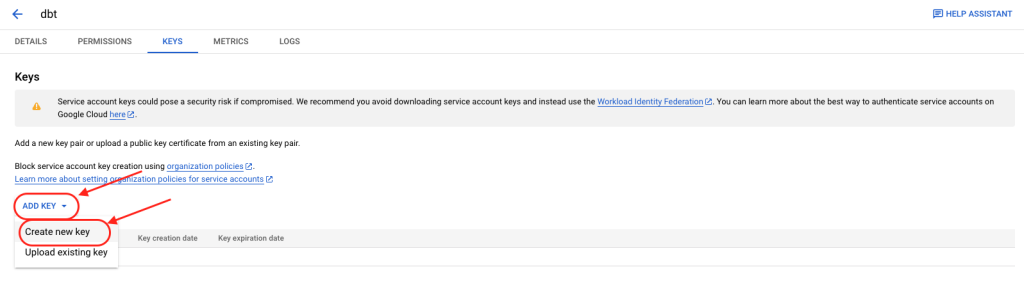
4. Ensure “JSON” is selected and click “CREATE”.
5. Save the JSON key download in a place on your computer that you can easily find later.
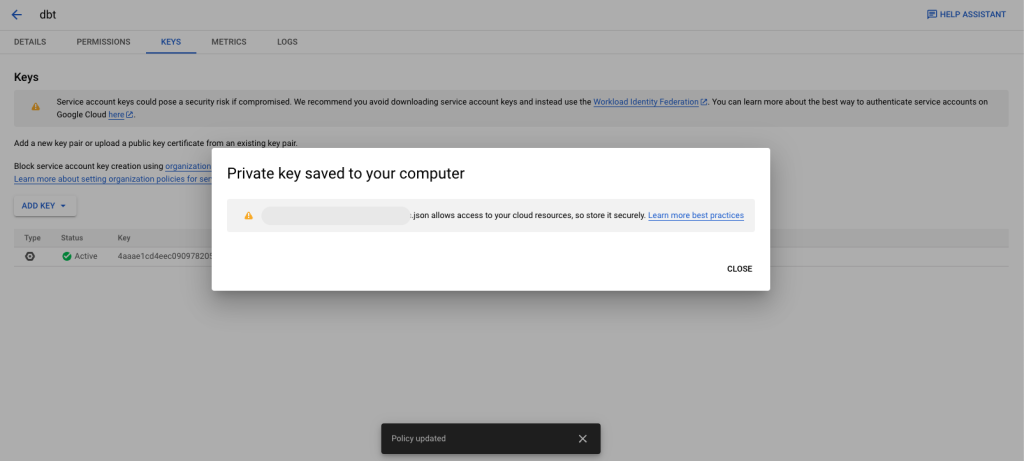
You should now have a downloaded JSON file on your computer.
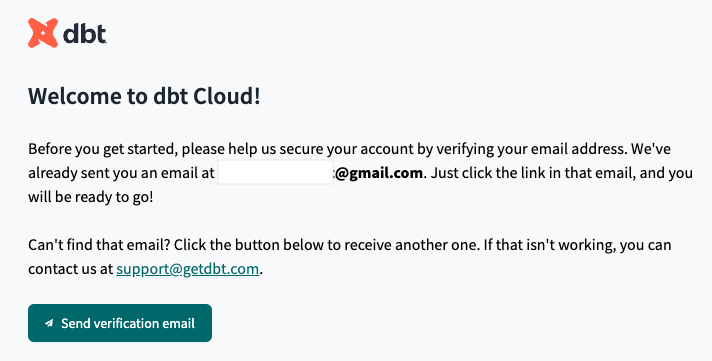
5. Create a new account in dbt (if you haven’t already)
You can create a free account in dbt here: https://www.getdbt.com/signup
Then verify your email.
6. Create a free GitHub account (if you haven’t already)
You can create a free GitHub account here: https://github.com/
Verify your email.
And create a new repository.
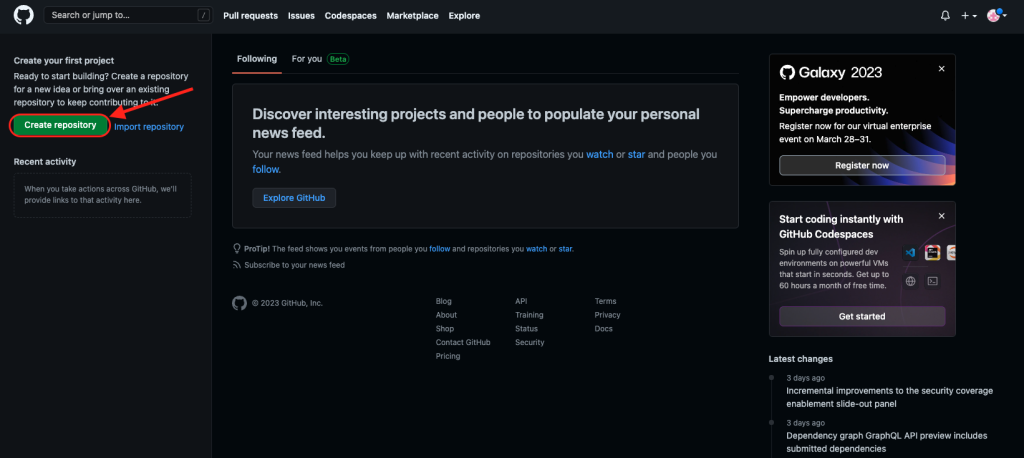
7. Create a new repository in GitHub
- Click on “Create repository”.
2. Enter details for your repository.
- Name your repository
- Choose public or private
- Leave everything else unchecked / blank
IMPORTANT: Make sure README file, .gitignore, and license fields are all left UNCHECKED and/or blank. Since we’re going to create these later with dbt… if you create them now, it will leave you with some problems. If you accidentally create a repository with these, it’ll be better to just re-create a new one.

Then, click on “Create repository”.
Congratulations! You now have a repository created.
8. Go back to dbt and connect your databases
- For “Choose a connection”, click “BigQuery”. Then click “Next”.

2. Remember the JSON key we downloaded in step 3? Here’s where we will use that…
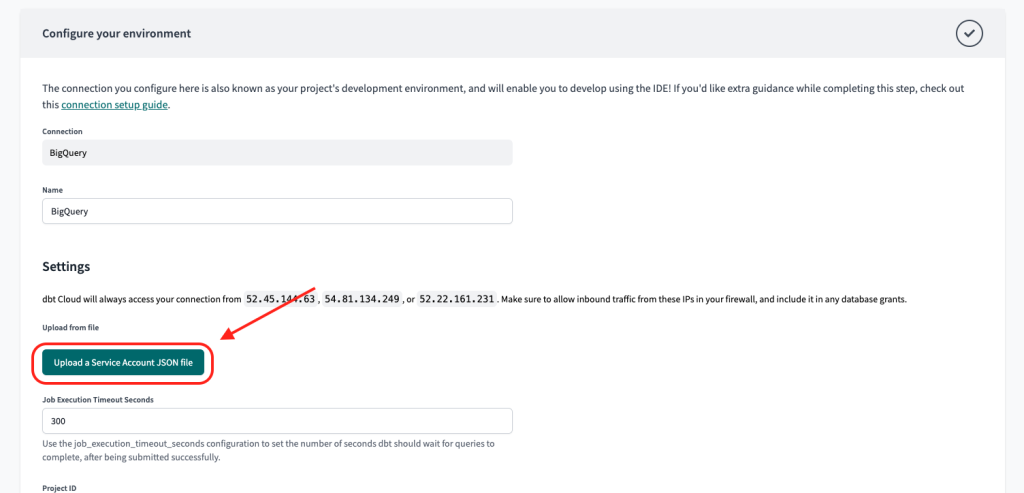
Under “Settings”, click the button “Upload a Service Account JSON file”.
Select the JSON file you had downloaded earlier.
After uploading, you’ll see all the fields below auto-populate with the info from your JSON key file.
3. For “dataset” name, you can leave as-is. This will be dbt_<firstnameinitial><lastname>.
For “Target name”, change to “dev”.
Then click “Test connection”.

After clicking on “Test Connection”, it should complete successfully.
Then click “Next”.
9. Then, connect your GitHub repository
- Click “GitHub” then “Connect GitHub Account”.
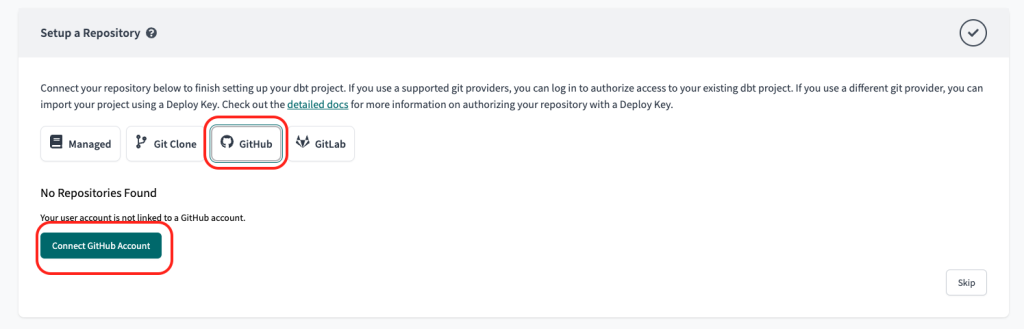
You will be prompted to login, connect, and choose which repository you’d like connected.
Select the repository name you’ve created above.
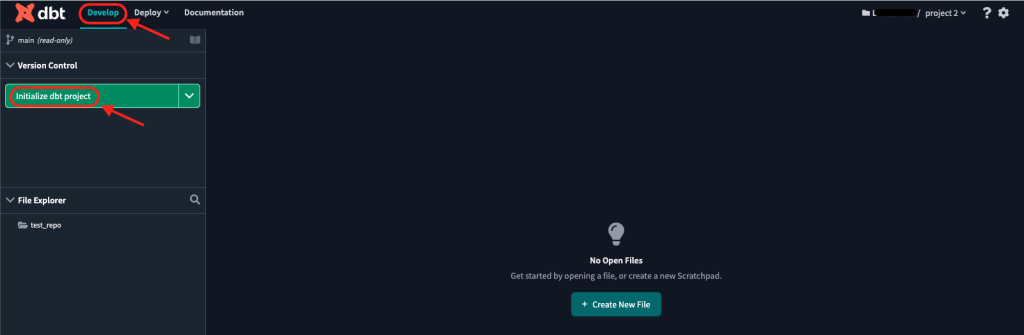
10. Go to dbt Cloud IDE, and initialize the project with an initial commit
- Click on “Develop” in the navigation header to go to the Cloud IDE.
- Then click on “Initialize dbt project”.
What this will do is create all the necessary files and configurations for you to upload (or “commit”) to your GitHub repository.
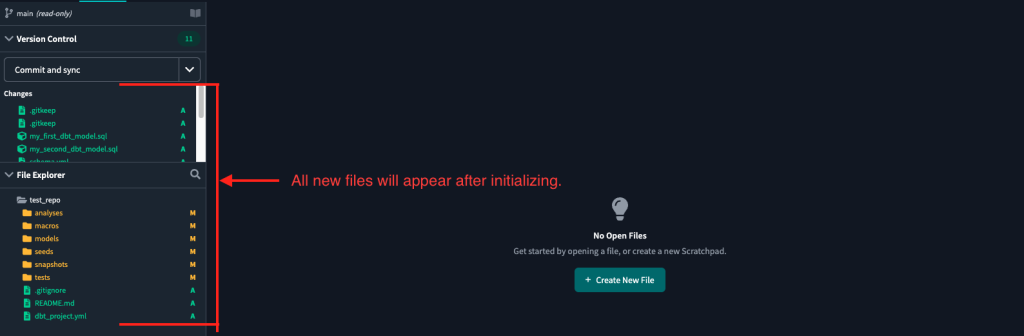
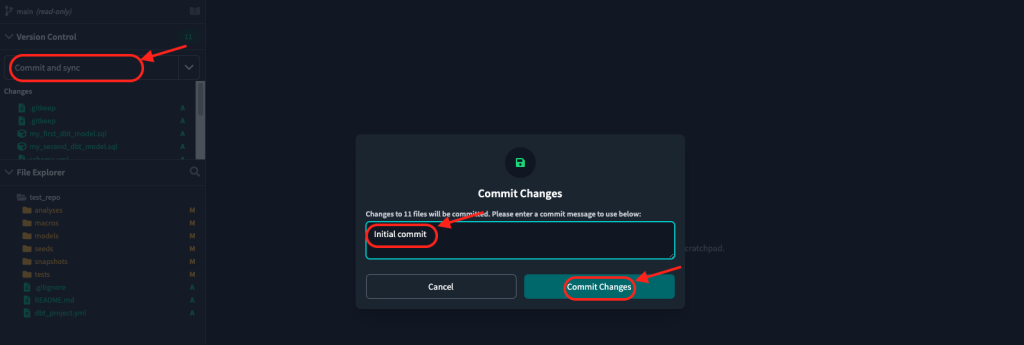
3. Once files have been added, you can commit and sync to GitHub.
Click “Commit and sync”.
Add a commit message “Initial commit”. (but message can be anything you want.)
Click “Commit Changes”.
Congratulations, you’ve now connected your databases, connected your repository, and made your first commit and sync to GitHub!
By now, you should have:
- Created and setup your data infrastructure warehouses
- Created a new dbt account and connected your databases to dbt
- Created a new GitHub account and repository
- Initialized your GitHub repository with an initial commit
In the next post, we’ll go over how to setup your “development” environment, your “production” environment, and how to materialize your models for each environment.