This is Part 2 of extracting random jokes from an API and loading it into a BigQuery table via a data pipeline aka python script.
In the first part, here’s what we went over:
- ✅ Get a random joke from the API
- ✅ Parse it out into a pandas DataFrame
- 🔲 Authenticate and connect to a BigQuery database
- 🔲 Load the random joke data into a BigQuery table
- 🔲 Deploy the script via crontab to run every minute, thus getting a new joke into our database every 60 seconds
- 🔲 Tear down (remove crontab lines)
In this part, we’ll go over authenticating, connecting to, and loading data into a BigQuery table.
Let’s jump right in…
Authenticate with Google BigQuery
This doc from Google shows us how to load a DataFrame into a BigQuery table using the BigQuery Client, but what does that look like in action?
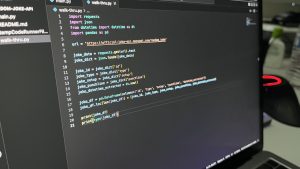
To recap, here is the code we’ve ended up with in the end of Part 1:
import requests
import json
from datetime import datetime as dt
import pandas as pd

url = 'https://official-joke-api.appspot.com/random_joke'

joke_data = requests.get(url).text
joke_dict = json.loads(joke_data)

joke_id = joke_dict['id']
joke_type = joke_dict['type']
joke_setup = joke_dict['setup']
joke_punchline = joke_dict['punchline']
joke_datetime_extracted = dt.now()

joke_df = pd.DataFrame(columns=['id', 'type', 'setup', 'punchline', 'datetime_extracted'])
joke_df.loc[len(joke_df)] = [joke_id, joke_type, joke_setup, joke_punchline, joke_datetime_extracted]

print(joke_df)
print(type(joke_df))
To begin the next step of authenticating with Google, we add this line to the top of the main.py file:
from google.cloud import bigqueryNote: You'll have to make sure you have the BigQuery client library for python installed on your virtual environment before you can import. Run the following command if you need to install it:
pip install --upgrade google-cloud-bigquery
Then, initialize the BigQuery client:
client = bigquery.Client()If you try running your code right away, you’ll get the following error due to not authenticating yet:
google.auth.exceptions.DefaultCredentialsError: Your default credentials were not found. To set up Application Default Credentials, see https://cloud.google.com/ docs/authentication/external/set-up-adc for more information.
Let’s authenticate…
First install and initialize the gcloud CLI.
The gcloud CLI is a set of tools that allows you to manage resources on Google Cloud Platform via your terminal’s command line interface.
Once installed, you can initialize by running the command:
gcloud auth application-default login
A new window will open in your browser prompting you to login to Google with your credentials.
Once successfully logged in, you’ll be directed to a page saying: You are now authenticated with the gcloud CLI!
What happened beneath the hood is that the gcloud CLI created and stored credentials for you on your computer.
Now when you run the code line with client = bigquery.Client(), you won’t get an error message.
Next, we load the DataFrame into a table in our BigQuery project.
Load Data Into a BigQuery Table
Alright, now before this step, make sure you have a dataset created already in your BigQuery project where you want to load in the data.
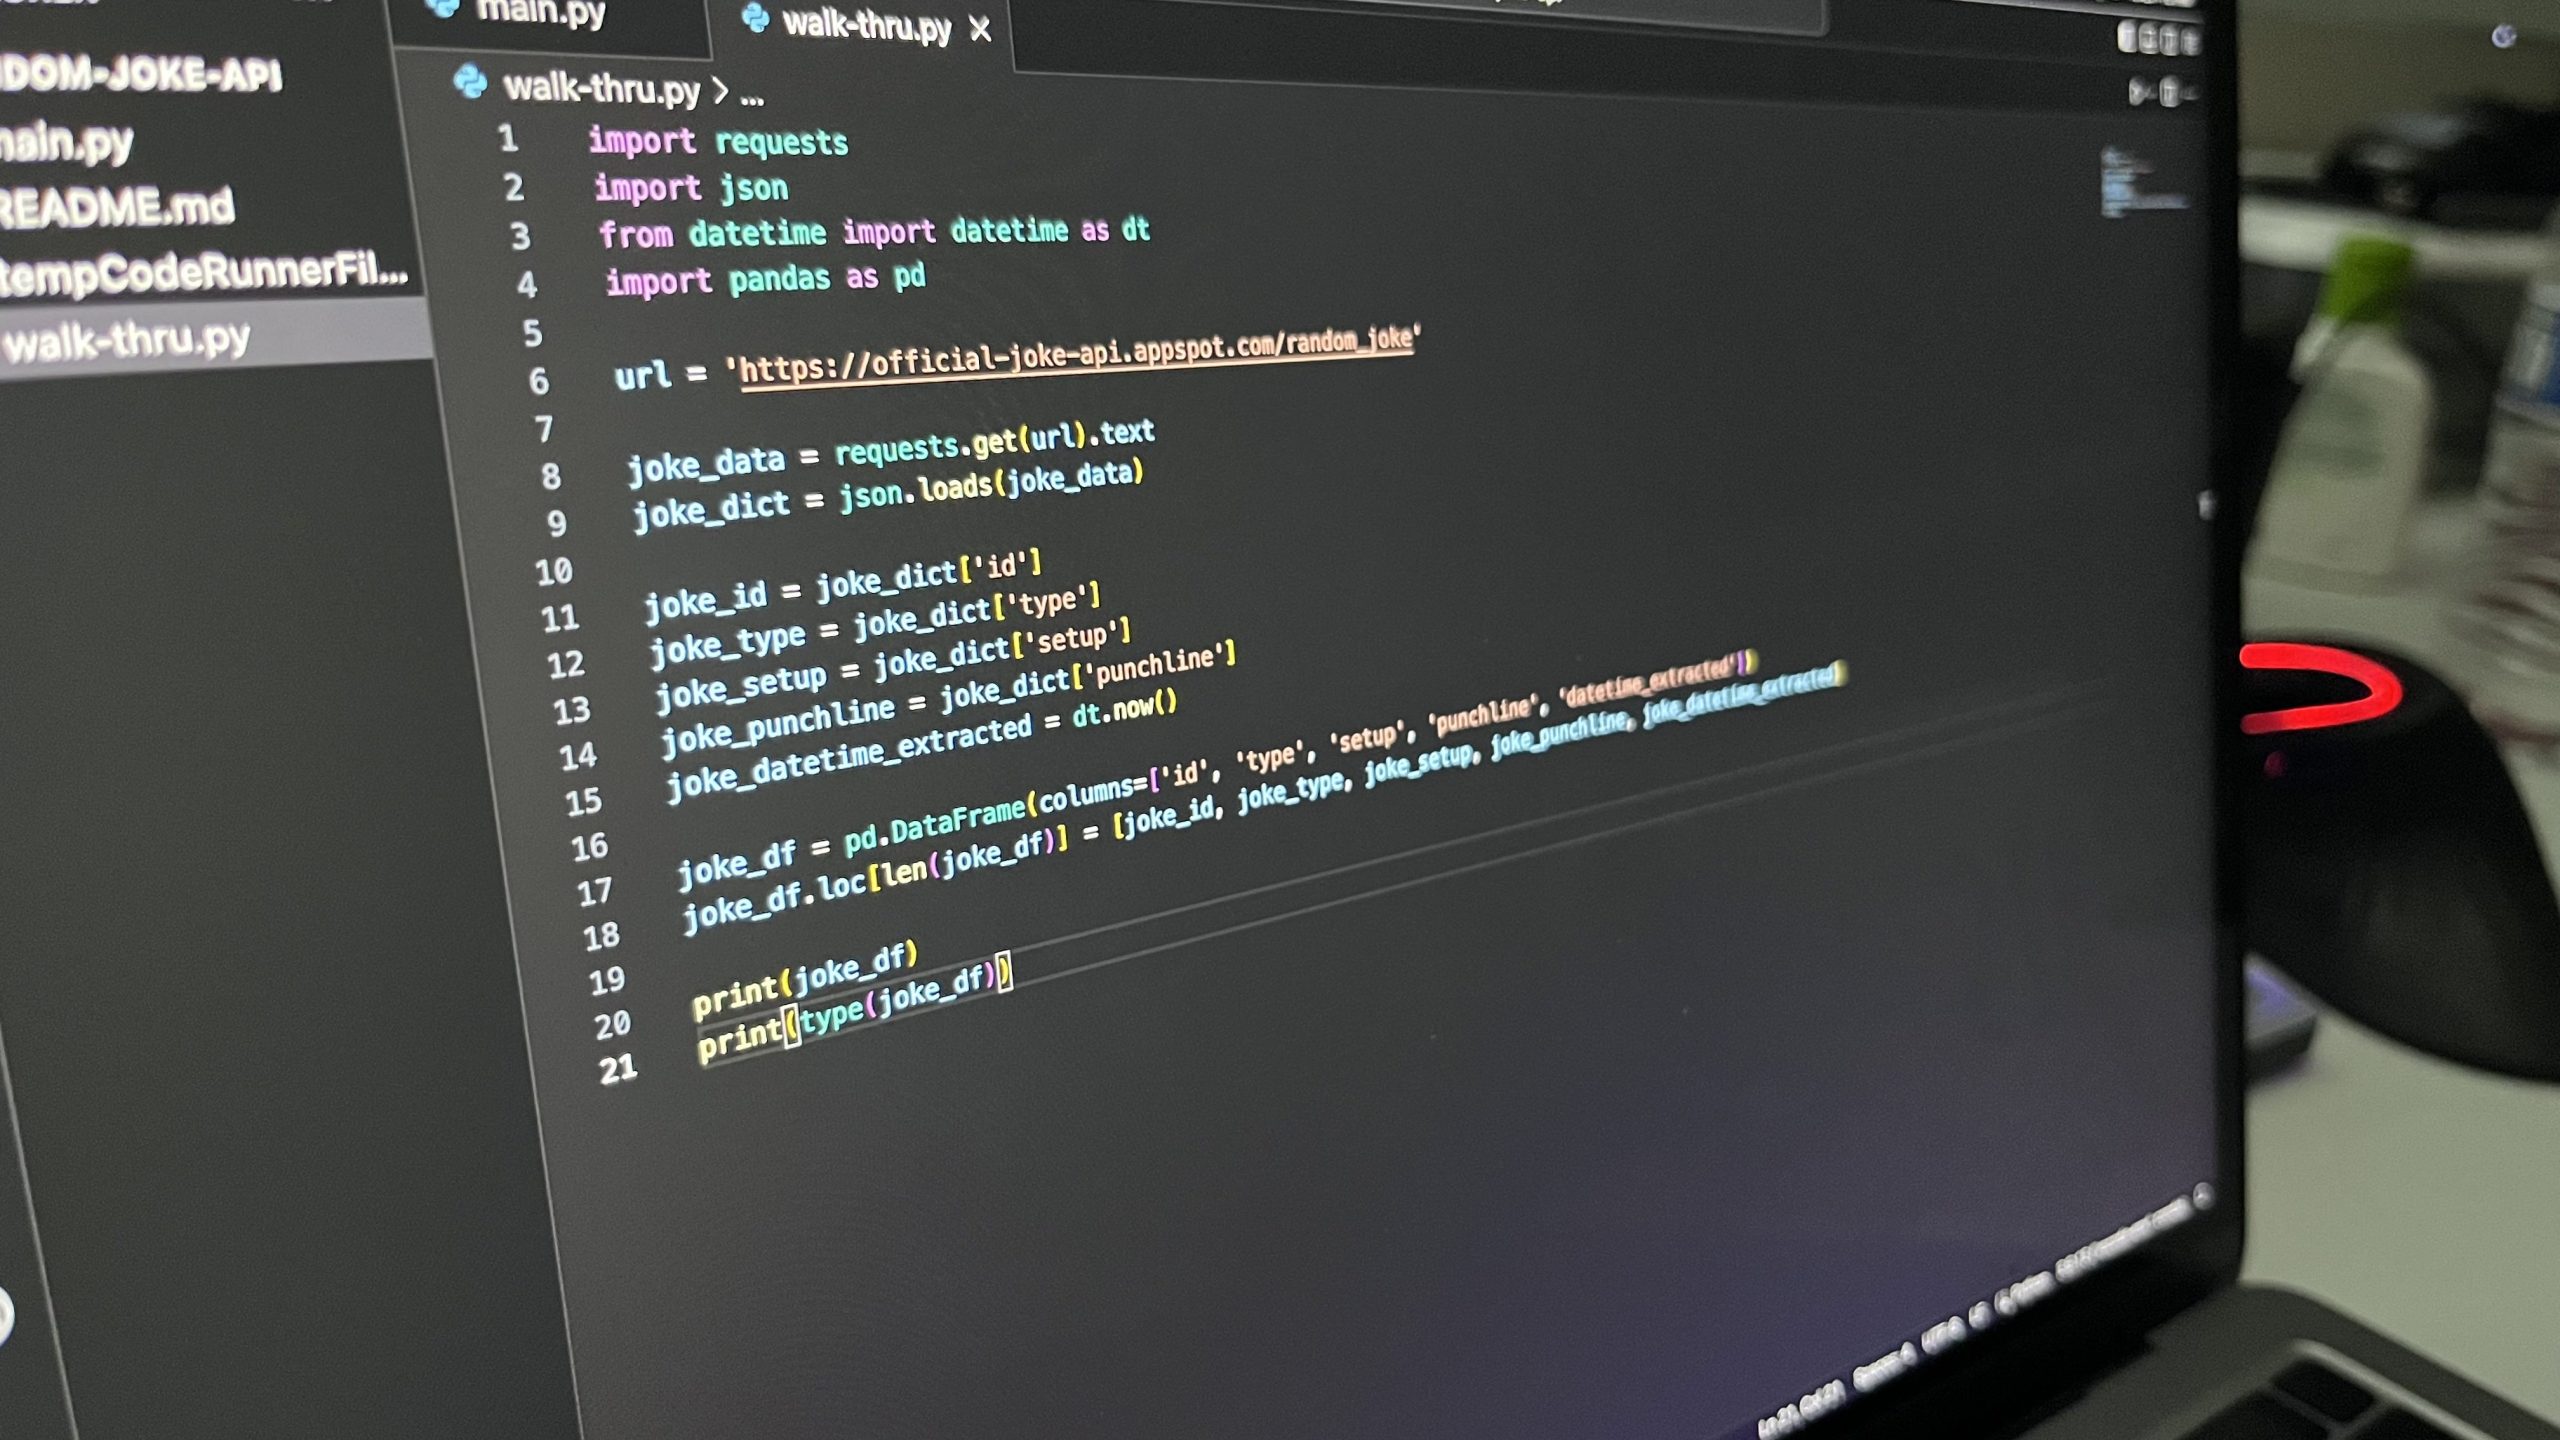
BigQuery database is structured like this:
Having a table already created is optional.
The only requirement is to have a project and dataset setup already.
If a table does not exist yet, the following function will create the table and infer the schema from the DataFrame. (schema is the definition and structure of the columns for the table)
In our walk-through, we’re going to just create the table from our python code on the first run.
And any subsequent runs after that, data will be appended.
Add the following code to your main.py file:
# Creating BQ table reference:
dataset_ref = bigquery.DatasetReference('YOUR-PROJECT-ID', 'YOUR-DATASET-ID')
table_ref = dataset_ref.table('random_jokes')

job = client.load_table_from_dataframe(joke_df, table_ref)
job.result()
All in all, your main.py file should look like this:
import requests
import json
from datetime import datetime as dt
import pandas as pd
from google.cloud import bigquery

url = 'https://official-joke-api.appspot.com/random_joke'

joke_data = requests.get(url).text
joke_dict = json.loads(joke_data)

joke_id = joke_dict['id']
joke_type = joke_dict['type']
joke_setup = joke_dict['setup']
joke_punchline = joke_dict['punchline']
joke_datetime_extracted = dt.now()

joke_df = pd.DataFrame(columns=['id', 'type', 'setup', 'punchline', 'datetime_extracted'])
joke_df.loc[len(joke_df)] = [joke_id, joke_type, joke_setup, joke_punchline, joke_datetime_extracted]

client = bigquery.Client()

# Creating BQ table reference:
dataset_ref = bigquery.DatasetReference('bigquery-demo-342018', 'walk_thrus')
table_ref = dataset_ref.table('random_jokes')

job = client.load_table_from_dataframe(joke_df, table_ref)
job.result()
Run the file, then check your BigQuery database.
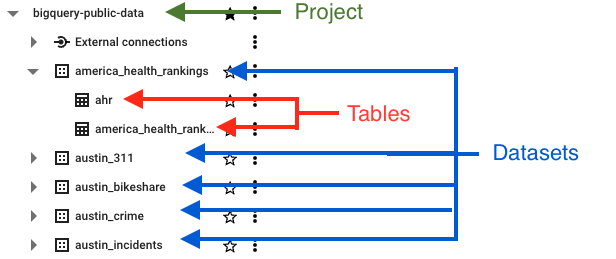
You should see something that looks like this:

Run the file again… another row will be appended:
Each time you run the file, an additional row will be appended.
YAY! We now have our ETL (Extract, Transform, Load) script!
The next step will be to deploy this so that we can have it run on a recurring schedule and keep having data added.
Deploy the Data Pipeline Script to Run Every Minute via Crontab
The cron command-line utility tool is a job scheduler that runs specific programs at specific times and days.
The crontab (short for cron table) is a file you edit to specify which programs you want to run on your computer and what time intervals you want to run them on.
This step took me quite a few tries and Googling to get to work… I’ll show you what I did and what I learned each step of the way.
How to Use Crontab in a Nutshell
To list out all your crontab entries:
crontab -l
To open the crontab editor:
crontab -e
To edit crontab using nano editor:
EDITOR=nano crontab -e
To run your main.py file every minute using crontab, add the following to a single line in your crontab:
* * * * * path/to/python path/to/main.pyNote: The 5 asterisk stars (* * * * *), each separated by a space, is crontab syntax for “every minute of every hour of every day of month of every month of every day of week”. (Wow, that’s a mouthful.) AKA every minute for as long as eternity until you stop it.
Tip: Use crontab.guru to generate specific job schedule timings.
Tip: Use crontab-generator.org to help you generate the exact crontab line you should add to your crontab file.
To find out the path to your python executor, use command:
which python
Tip: I found it safe to use the whole path (and not the relative paths) to both the python executor and the main.py script file. Just so that the shell knows exactly where to find them.
To have crontab log all errors to a separate file, add this to the end of your crontab line:
>> out.txt 2>&1Here’s what my crontab file looked like at the end:
* * * * * /Users/gracevonn/opt/anaconda3/envs/vscode-env/bin/python /Users/gracevonn/github/random-joke-api/main.py >> out.txt 2>&1To save your file using nano editor:
control (^) + O
To exit the nano file editor:
control (^) + X
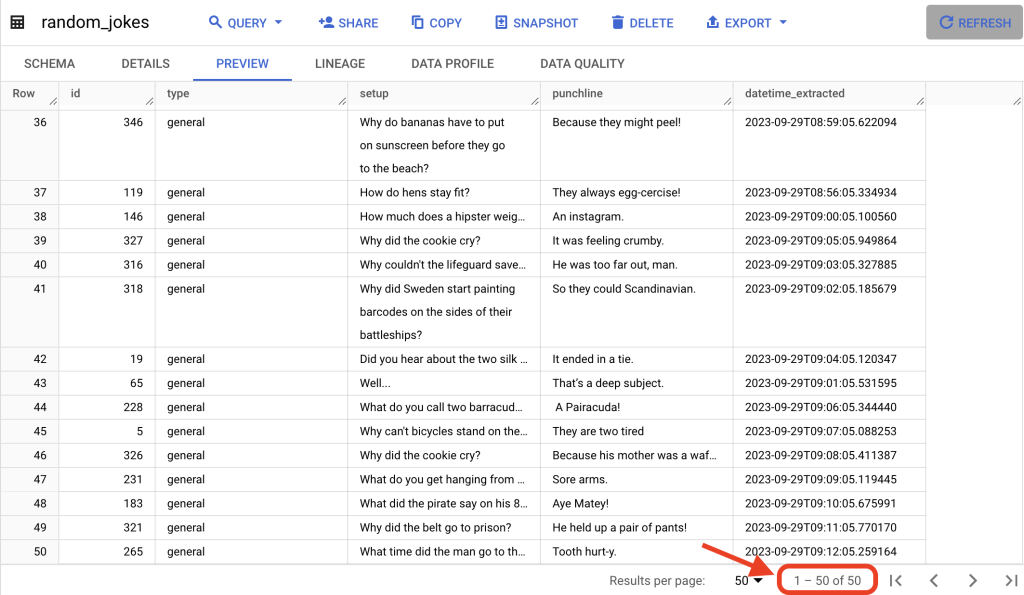
Hopefully, by now, you will see that you’re getting additional rows of random joke data added to your BigQuery table.
During the time I was writing this, I now have about 50 records in my random_jokes table:
If you find that it’s still not working out for you, go through the process of finding the error and debugging.
Since it’s very difficult to debug with cron, adding this output code to the end of your crontab entry >> out.txt 2>&1 will definitely help you to see where crontab is failing.
If you need help finding out where the out.txt file is being stored, just search for it in your file system. In my case, it ended up being stored in my Home directory.
Here’s what I did to debug my setup:
How I Debugged My Crontab Setup
After including the >> out.txt 2>&1 piece of code in my crontab entry, each time an error happened, I was able to see what it was.
First error: /bin/sh: python: command not found
My crontab file originally looked like this:
* * * * * python /Users/gracevonn/github/random-joke-api/main.py >> out.txt 2>&1This is what my out.txt file looked like:
/bin/sh: python: command not found
/bin/sh: python: command not found
/bin/sh: python: command not found
/bin/sh: python: command not found
/bin/sh: python: command not found
/bin/sh: python: command not found
/bin/sh: python: command not found
/bin/sh: python: command not found
/bin/sh: python: command not found
I found out that wherever cron was being run, it didn’t have any idea where my python executor was.
Solution:
Run command:
which python
It returned:
/Users/gracevonn/opt/anaconda3/envs/vscode-env/bin/python
So I replaced python with the entire path of python in the crontab file.
My crontab file then came out to:
* * * * * /Users/gracevonn/opt/anaconda3/envs/vscode-env/bin/python /Users/gracevonn/github/random-joke-api/main.py >> out.txt 2>&1Second error: OSError: Project was not passed and could not be determined from the environment.
The entire error message looked like this:
Traceback (most recent call last):
  File "/Users/gracevonn/github/random-joke-api/main.py", line 21, in <module>
    client = bigquery.Client()
  File "/Users/gracevonn/opt/anaconda3/envs/vscode-env/lib/python3.9/site-packages/google/cloud/bigquery/client.py", line 245, in __init__
    super(Client, self).__init__(
  File "/Users/gracevonn/opt/anaconda3/envs/vscode-env/lib/python3.9/site-packages/google/cloud/client/__init__.py", line 318, in __init__
    _ClientProjectMixin.__init__(self, project=project, credentials=credentials)
  File "/Users/gracevonn/opt/anaconda3/envs/vscode-env/lib/python3.9/site-packages/google/cloud/client/__init__.py", line 269, in __init__
    raise EnvironmentError(
OSError: Project was not passed and could not be determined from the environment.
You can see it was due to line 21 in my file that says: client = bigquery.Client().
It basically says the BigQuery client was not able to determine which project id I was using inside the cron.
So in my development environment inside of Visual Studio Code, I had a virtual environment setup and everything would work correctly from that environment.
However, when we deployed this via cron, the script was now being run in a different environment and didn’t have all the information it needed to run successfully.
So… a simple fix.
Solution:
I added an additional line to assign a project_id variable with my project id. Then passed that variable into bigquery.Client() as an argument:
project_id = 'MY-PROJECT-342018'

client = bigquery.Client(project_id)
I saved the entire main.py file:
import requests
import json
from datetime import datetime as dt
import pandas as pd
from google.cloud import bigquery

url = 'https://official-joke-api.appspot.com/random_joke'

joke_data = requests.get(url).text
joke_dict = json.loads(joke_data)

joke_id = joke_dict['id']
joke_type = joke_dict['type']
joke_setup = joke_dict['setup']
joke_punchline = joke_dict['punchline']
joke_datetime_extracted = dt.now()

joke_df = pd.DataFrame(columns=['id', 'type', 'setup', 'punchline', 'datetime_extracted'])
joke_df.loc[len(joke_df)] = [joke_id, joke_type, joke_setup, joke_punchline, joke_datetime_extracted]

project_id = 'MY-PROJECT-342018'

client = bigquery.Client(project_id)

# Creating BQ table reference:
dataset_ref = bigquery.DatasetReference(project_id, 'walk_thrus')
table_ref = dataset_ref.table('random_jokes')

job = client.load_table_from_dataframe(joke_df, table_ref)
job.result()
And next minute…. NO ERRORS!
I checked my table in BigQuery… and there it was, all the new data getting appended.
Here are my learnings in a nutshell:
My Learnings from Using Crontab
- Crontab is incredibly hard to debug. If you set it up and notice that no additional rows are being added to your BigQuery table, cron won’t give you any error messages. Instead, add this to the end of your crontab line to have all error messages logged to a file:
>> out.txt 2>&1
- If you find that you cannot edit the file in your terminal, you can specify to use the nano editor with the command:
EDITOR=nano crontab -e
Teardown: Removing Crontab Entries
1.List out your crontab entries to see what you have:
crontab -l
2. Remove all entries in your crontab file:
crontab -r
3. List out your crontab entries again to verify everything has been removed:
crontab -l
You should get a message:
crontab: no crontab for gracevonnWe have now finished everything on our list:
- ✅ Get a random joke from the API
- ✅ Parse it out into a pandas DataFrame
- ✅ Authenticate and connect to a BigQuery database
- ✅ Load the random joke data into a BigQuery table
- ✅ Deploy the script via crontab to run every minute, thus getting a new joke into our database every 60 seconds
- ✅ Tear down (remove crontab lines)
I am currently working on a project that will help those using Google Analytics. Since Universal Analytics will be deleted soon in July 2024, I’m putting together a tutorial on how to export your UA data and get it into a free Looker Studio Dashboard. If you would like access when it gets released, send me an email at grace@vonndata.com.
Hope you enjoyed,
Grace